Elastic waistbands are a staple in the world of sewing, providing comfort and flexibility to a wide range of garments. Whether you’re a beginner, intermediate, or expert sewer, mastering the art of calculating and attaching elastic for a waistband is a valuable skill. In this comprehensive guide, we’ll explore various methods suitable for sewers of all skill levels.
Understanding Elastic Basics:
Before delving into the calculation methods, let’s review some elastic basics:
-
Types of Elastic:
- Woven Elastic: Sturdy and suitable for heavier fabrics.
- Knit Elastic: Soft and flexible, ideal for lightweight fabrics.
- Braided Elastic: Resilient and suitable for a variety of fabrics.
- Clear Elastic: Invisible and ideal for lightweight fabrics like sheers.
-
Choosing the Right Width:
- For most waistbands, a width between 3/4 inch to 2 inches is common.
- Thinner elastics work well for lightweight fabrics, while wider ones provide more support for heavier fabrics.
Now, let’s explore various methods to calculate elastic for a waistband.
For Beginners: Simple and Straightforward
-
Measuring Your Waist:
- Measure your waist where you want the waistband to sit. Add 1-2 inches for seam allowances and comfort.
-
Selecting Elastic Length:
- For beginners, it’s often easiest to use the exact waist measurement for the elastic length.
-
Adding Seam Allowance:
- If your pattern or garment requires a seam allowance, add it to the elastic length.
-
Cutting and Attaching:
- Cut the elastic to the calculated length.
- Secure the elastic into a loop by sewing the ends together.
- Divide the elastic and waistband into quarters, then match these points and sew the elastic to the fabric.
For Intermediate Sewers: Customized Comfort
-
Adjusting for Fabric Stretch:
- If using a stretchy fabric, reduce the elastic length slightly to account for the fabric’s natural stretch.
-
Calculating Percentage:
- Measure the fabric’s stretch percentage by pulling it gently. Use this percentage to calculate the elastic length.
- Elastic Length = Waist Measurement * (1 – Stretch Percentage)
-
Determining Waistband Width:
- Decide on the desired width of the waistband and add seam allowances.
- If using a casing, add extra length for the casing.
-
Creating a Casing:
- Sew a casing for the elastic by folding the waistband fabric over and securing it, leaving an opening for the elastic.
- Insert the elastic using a safety pin or bodkin and secure the ends.
For Expert Sewers: Precision and Versatility
-
Adding Negative Ease:
- For a snug fit, incorporate negative ease by reducing the elastic length further (usually 5-10% less than the actual waist measurement).
-
Multi-Channel Waistbands:
- Create a multi-channel waistband by sewing multiple rows of parallel stitches, leaving gaps for elastic insertion.
- Insert individual elastics into each channel for a tailored fit.
-
Encased Elastic with Pockets:
- Incorporate pockets into your garment and encase the elastic within the waistband, ensuring a smooth and polished finish.
-
Customizing for High or Low Rise:
- Adjust the waistband height based on whether you prefer a high or low rise. Consider comfort and fashion trends when deciding on the placement.
-
Decorative Options:
- Experiment with decorative techniques like ruching, gathers, or attaching a separate fabric strip for a contrasting effect.
Tips for All Skill Levels:
-
Test with Scrap Fabric:
- Before committing to the final garment, test your elastic calculations on scrap fabric to ensure the desired fit.
-
Use a Walking Foot:
- When sewing elastic to fabric, a walking foot can help prevent stretching and ensure even stitches.
-
Secure Elastic Ends:
- Always secure the ends of the elastic by stitching multiple times or using a reinforcing method to prevent unraveling.
-
Consider Pattern Recommendations:
- Many patterns provide specific instructions for elastic length and placement. Follow these recommendations for a tailored result.
-
Experiment with Different Elastics:
- Try various types of elastics to see which works best for your specific project. Clear elastic, for example, is great for lightweight fabrics where visibility is essential.
Conclusion:
Mastering the art of calculating elastic for a waistband is a crucial skill for sewers of all levels. From beginners seeking simplicity to experts aiming for precision, the methods presented in this guide offer a range of options. Remember to consider your fabric type, desired fit, and the overall design of your garment. With practice and experimentation, you’ll become adept at creating waistbands that combine comfort and style seamlessly. Happy sewing!
Frequently Asked Questions
How much elastic do I need for a waistband?
When it comes to sewing your own clothes, one of the most important considerations is how much elastic you need for a waistband. This can vary depending on the project you’re working on, but there are some general guidelines you can follow to ensure you get the right amount. For a basic waistband, you’ll want to allow for about 1/2 inch of elastic per 1 inch of the waist measurement.
So, if you’re making a waistband for a garment that has a 28-inch waist, you’ll need 14 inches of elastic. If you’re making a gathered skirt or pants, you’ll need even more elastic to allow for a comfortable fit. When buying elastic, it’s also important to consider the width.
For a waistband, you’ll want to look for 1/2 to 1-inch wide elastic. This will give you the best support and hold without being too bulky. Now that you know how much elastic you need for a waistband, you can get started on your next sewing project!
How to measure elastic for wrist
If you’re looking to measure your elastic for a wrist bracelet or other craft project, you’ll need to know a few things first. Measuring elastic can be a little tricky, but with a few tips and tricks, you’ll be a pro in no time! To start, you’ll need a tape measure.
Measure the circumference of your wrist (or wherever you’ll be wearing the bracelet) and write down the number. Next, you’ll need to decide how tight or lose you want the bracelet to be. For a snug fit, you’ll want to subtract 1-2 inches from your wrist measurement.
For a loose fit, you’ll want to add 1-2 inches. Now you’re ready to measure your elastic! If you’re using a flat elastic, simply wrap it around your wrist (or another body part) and mark where the two ends meet.
If you’re using a round elastic, you’ll need to thread it through a needle first. Once it’s threaded, tie a knot in the end and wrap it around your wrist. Again, mark where the two ends meet.
Once you have your elastic marked, measure the distance between your marks. This is the length you’ll need to cut your elastic. Cut the elastic to your desired length and you’re ready to start crafting!
How to measure elastic for a casing
If you’re looking to measure elastic for the casing, there are a few things you’ll need to take into account. First, you’ll need to know the dimensions of the casing itself. Next, you’ll need to determine the type of elastic you’ll be using.
Finally, you’ll need to calculate the amount of elastic needed based on the dimensions of the casing and the type of elastic being used. To start, you’ll need to measure the circumference of the casing at the widest point. Next, measure the length of the casing from the top to the bottom.
With these two measurements, you’ll be able to calculate the area of the casing. Now that you know the dimensions of the casing, you’ll need to determine the type of elastic you’ll be using. There are two main types of elastic – flat and round.
Flat elastic is typically used for light-duty applications, while round elastic is better suited for heavier-duty applications. Once you’ve determined the type of elastic, you’ll need to calculate the amount needed. For flat elastic, you’ll need to multiply the length of the casing by the width of the elastic.
For round elastic, you’ll need to multiply the circumference of the casing by the width of the elastic. With these measurements and calculations, you’ll be able to purchase the proper amount of elastic for your casing project.
How to measure elastic for leg holes
If you’re making your own clothes, it’s important to know how to measure elastic for leg holes. This will ensure a comfortable and proper fit. Here’s what you need to do:
- Measure the circumference of your leg just below the knee.
- Cut a piece of elastic that is about 2 inches longer than this measurement.
- Pin one end of the elastic to the fabric at the side seam of the pant leg.
- Stretch the elastic around the leg, being sure to keep it parallel to the fabric edge.
- Pin the other end of the elastic to the fabric at the side seam.
- Sew the elastic in place, using a zigzag stitch.
- Trim any excess elastic. Now you know how to measure elastic for leg holes. This simple task will ensure a comfortable and proper fit for your pants.
How do you calculate how much elastic to use?
Elasticity is the measurement of how much a material can stretch or compress. To calculate the amount of elastic needed for a project, you will need to know the dimensions of the area to be covered, the amount of stretch or compression desired, and the elasticity of the fabric. To determine the dimensions of the area to be covered, measure the length and width of the section that needs to be stretched or compressed.
For example, if you are working with a 2-inch by 2-inch piece of fabric, the area to be covered is 4 square inches. The amount of stretch or compression desired will be determined by the project. For example, if you are making a garment that needs to stretch to fit over a person’s body, you will need more elastic than if you are simply trying to keep a piece of fabric in place.
The elasticity of the fabric is measured in percent stretch. This can be found in the description of the fabric or on the bolt of the fabric itself. For example, a fabric with 10% stretch means that it will stretch 10% of its original size.
So, if you have a 2-inch by 2-inch piece of fabric with 10% stretch, it will stretch to 2.2 inches by 2.2 inches. Now that you have the dimensions of the area to be covered and the amount of stretch or compression desired, you can calculate the amount of elasticity needed.
How wide should elastic be for the waistband?
Elastic waistbands are a vital part of many garments, from underwear to activewear. They provide a comfortable, adjustable fit that can be easily adjusted to accommodate different body types and sizes. But how wide should elastic be for the waistband?
The elastic width for the waistband will vary depending on the garment and the desired level of comfort and support. For example, a wider elastic waistband will be more supportive and can help to hold in the stomach, while a narrower waistband will be more comfortable and allow for more movement. ultimately, the decision of how wide to make an elastic waistband is up to the individual.
It is important to consider the intended use of the garment and the desired level of comfort and support when choosing the width of the elastic.
How much should you stretch elastic?
When it comes to stretching elastic, there is no one-size-fits-all answer. The amount that you should stretch your elastic will depend on the type of elastic you are using, the project you are working on, and your personal preferences. For example, if you are using elastic for a project that will see a lot of wear and tear, such as a pair of pants or a skirt, you will want to stretch it more than you would for a project that will not see as much wear, such as a headband.
Similarly, if you are using a thinner elastic, you will want to stretch it more than you would a thicker elastic. This is because the thinner elastic is more likely to break if it is not stretched enough. Finally, it is important to stretch your elastic before you use it.
This will help ensure that it is the correct size for your project and that it will not break when you are working with it. In general, you should stretch your elastic until it is about twice its original size. This will ensure that it is stretchy enough to do its job, but not so stretchy that it will break easily.
If you are unsure how much to stretch your elastic, it is always better to err on the side of stretching it more rather than less. This way, you can be sure that your elastic will be up to the task at hand.
How do you measure elastic for cuffs?
If you’re looking to add some elastic to your cuffs, there are a few things you’ll need to take into consideration before you get started. First, you’ll need to determine how much elasticity you’ll need. This will depend on the size of your cuffs and how tight you want them to be.
Once you have that figured out, you’ll need to measure the elastic. To do this, simply wrap the elastic around your cuff and mark where it meets. Then, stretch the elastic out and measure the distance between your marks.
This will give you the length of elastic you’ll need to add to your cuff. Now that you have the elastic measured, you’ll need to attach it to the cuff. There are a few different ways you can do this, but the most common is to sew it on.
To do this, simply place the elastic on the inside of the cuff and sew it in place. Once you’ve sewn it on, try the cuff to make sure it’s the right size. If it’s too loose, you can always sew it on tighter.
And that’s all there is to it! With a little bit of time and effort, you can easily add some elastic to your cuffs and make them fit better than ever.
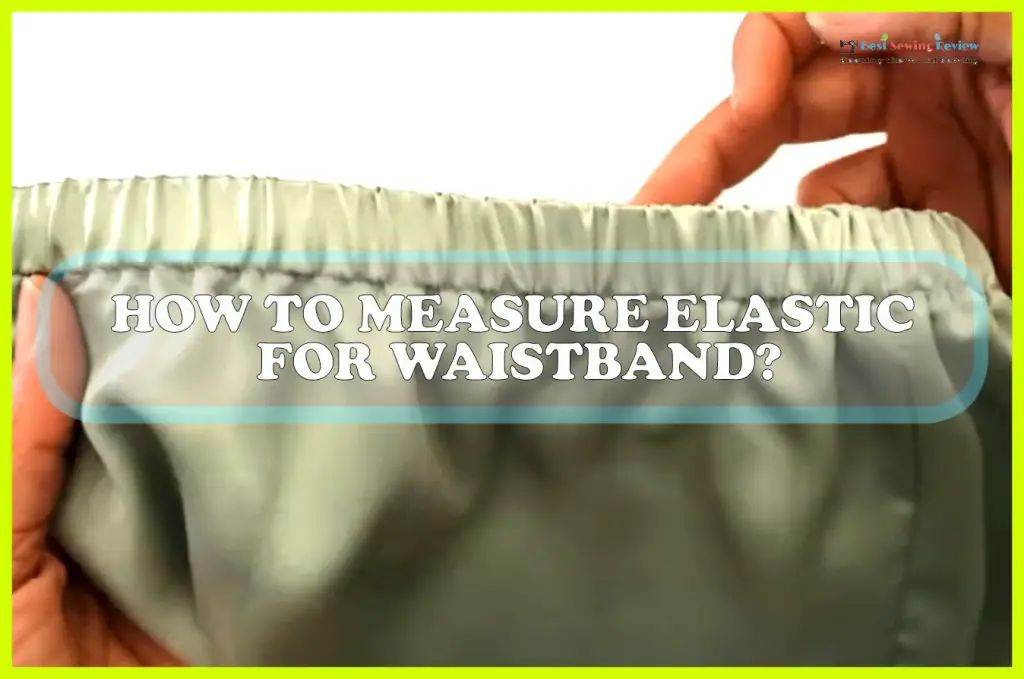
How Do You Measure Elastic for Waistband?
In order to measure elastic for a waistband, you will need a measuring tape and something to mark the elastic with. Measure the circumference of your waist where you would like the waistband to sit. Cut a piece of elastic that is slightly longer than this measurement.
Attach one end of the elastic to your waistband using a zigzag stitch or by hand-sewing it in place. Try on the garment and pull the elastic until it is snug but not too tight around your waist. Mark where the other end of the elastic meets up with the first end, then remove the garment.
Cut the elastic at this point and overlap the ends by about 1 inch (2.5 cm). Sew the ends together using a zigzag stitch or by hand-sewing them in place.
How Much Do You Add for Elastic Waistband?
If you’re adding an elastic waistband to a garment, you’ll need to allow for both the width of the band itself and the amount of gathering that will occur when it’s sewn onto the fabric. As a general rule, you should add 1″ (2.5 cm) for the width of the band plus 1/2″ (1.3 cm) for gathering. So, if you’re working with a 2″ (5 cm) wide elastic, you’ll need to add 3″ (7.6 cm) to your garment’s waist measurement.
How Much Elastic Do You Use When Sewing?
There is no definitive answer to this question as it depends on personal preference and the project you are working on. Some people prefer to use a lot of elastic when sewing, while others use very little. It really comes down to what works best for you and the specific project you are working on.
If you are working on a garment that needs to be very fitted, such as a pair of pants or a dress, then using more elastic can help to create a better fit. On the other hand, if you are working on something that doesn’t need to be as fitted, like a skirt or top, then using less elastic may be just fine. Ultimately, it’s up to you to decide how much elasticity you need for your project.
How Much Should I Stretch Elastic When Sewing?
If you’re wondering how much to stretch elastic when sewing, the answer is not as simple as you might think. It depends on the type of fabric you’re using, the weight of the fabric, and the width of the elastic. For lightweight fabrics like cotton, you’ll want to stretch the elastic about 50%.
This will allow for a snug fit without being too tight. For heavier fabrics like denim, you’ll want to stretch the elastic about 75%. This will ensure a comfortable fit that won’t be too loose.
The width of the elastic also plays a role in how much stretching is necessary. For wider elastics (1″ or more), you’ll want to stretch them less than narrower elastics (3/4″ or less). This is because wider elastics have more give and can accommodate more stretching without becoming too loose.
Ultimately, it’s best to experiment with different levels of stretching until you find what works best for your project.
How to Measure Elastic for Sleeves
Assuming you want a blog post about how to measure elastic for sleeves on a garment: When it comes to adding sleeves to a garment, one of the most important things is getting the right fit. And part of getting the perfect fit is selecting the right type and size of elastic.
In this blog post, we’ll show you how to measure elastic for sleeves so that your next sewing project turns out to look just the way you want it! There are two main types of elastic: woven and non-woven. Woven elastics are made from interlacing threads, while non-woven elastics are made from bonding fibers together.
Each type has its own advantages and disadvantages, so it’s important to choose the right one for your project. Woven Elastic: + More durable
+ Holds shape better – Can be more difficult to sew with – Not as stretchy as non-woven elastic
Non-Woven Elastic: + More flexible + Easier to sew with
– Not as durable as woven elastic Once you’ve selected the type of elastic you want to use, it’s time to measure! To do this, you’ll need a tape measure and something soft (like a pencil) to mark where you’re measuring.
Start by holding the end of the tape measure at the center back neckline of your garment. Then, stretch the tape measure down along the sleeve until you reach the wrist (or wherever else you want the sleeve to end). Make sure not to take too much fabric in – remember, we’re just trying to get an idea of how long our piece needs to be! When you reach the endpoint, make a small mark with your pencil.
How to Measure Elastic for Pants Waist
Are you looking to make some custom-fit pants but don’t know how much elastic to buy? Here’s a quick guide on how to measure elastic for pants’ waist. You’ll need:
- A measuring tape -Pants that fit you well (to use as a sizing guide) -Paper and pencil (for taking notes)
- Scissors (optional)
Instructions:
- Wrap the measuring tape around your natural waist, where you typically wear pants. Note the measurement. This is your starting point for figuring out how much elasticity you’ll need.
- Next, put on the pants that fit you well and determine where you’d like the waistband to sit – at your natural waist, below your belly button, or somewhere in between? Measure this distance from the top of the waistband to your natural waistline. This number will be subtracted from step 1’s measurement. For example, if step 1 measured 28 inches and step 2 measured 3 inches, then you’ll need 25 inches of elastic for your pants’ waistband.
- Decide how wide you want the finished waistband to be. A wider band will require more elasticity than a narrower one. To get an idea of width, look at commercial pants’ waistbands and choose a width that appeals to you – anywhere from 1 inch to 3 inches is typical. Once you have decided on a width, multiply this number by 2 (since there are 2 sides to every pant leg). So if you wanted a finished waistband that was 2 inches wide, then you would need 4 inches of elastic total. Add this number to Step 2’s measurement; in our previous example with a Step 2 measurement of 3 inches, we would now need 29 inches of elastic total (3 + 4 = 7; 28 – 7 = 21).
- If desired, cut off any excess length from your measuring tape before beginning to sew!
How to measure an elastic waist for a toddler
As a parent, you know that your toddler is growing quickly and that it can be hard to keep up with their changing wardrobe needs. One thing that you can do to make sure that you are always prepared is to take their elastic waist measurements. This way, you can easily purchase or make clothing that will fit them properly as they continue to grow.
Here is a guide on how to measure your toddler’s elastic waist:
- Start by having your child put on a pair of snug-fitting pants or shorts. If possible, try to have them wear something that has an elastic waistband so that it will be easy to take the measurement.
- Use a measuring tape to measure around the widest part of their tummy, making sure to go over the top of the pants/shorts in order to get an accurate measurement.
- Make a note of this measurement and compare it to a size chart (you can find these online or in most sewing pattern books). This will help you determine what size clothing your toddler will need in the future.
- Repeat this process every few months or as needed so that you always have up-to-date measurements on hand. That way, you can rest assured knowing that whatever clothes you purchase or make for your toddler will fit them perfectly!