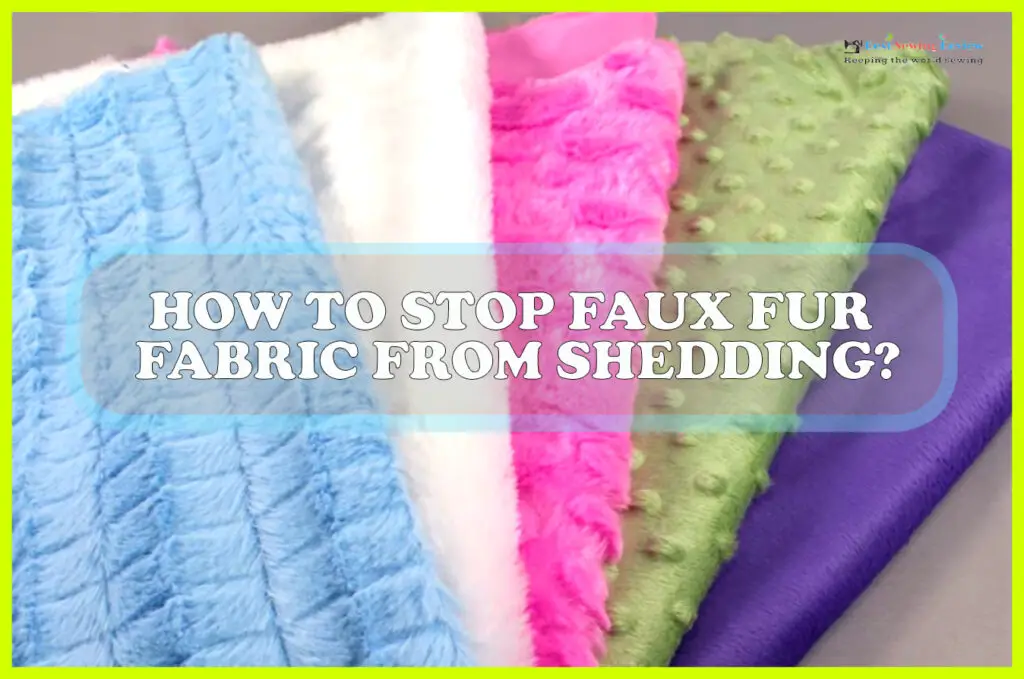
Faux fur is a great alternative to real fur, but it can be difficult to keep the fabric from shedding. Here are a few tips on how to stop faux fur fabric from shedding: – Brush the fabric in the direction of the nap with a soft-bristled brush. – Vacuum the fabric with the upholstery attachment.
– Store the garment in a breathable bag when not in use. By following these tips, you can keep your faux fur looking fabulous for years to come!
- Cut a small swatch of fabric from the edge of the faux fur piece
- Rub the swatch against a piece of fine-gauge sandpaper
- If the fabric starts to shed, it’s not good quality and will continue to do so with wear
- Choose another fabric instead
Polyester Faux Fur Shedding
If you’re looking for a cozy, luxurious fabric to use for your next project, consider polyester faux fur. This fabric has all the benefits of real fur without the shedding and animal cruelty. Polyester faux fur is also much more affordable than real fur, making it a great option for budget-conscious crafters.
One downside of polyester faux fur is that it can shed quite a bit. This is especially true if you purchase a lower quality fabric or if you don’t take good care of it. To avoid excess shedding, make sure to store your polyester faux fur in a cool, dry place out of direct sunlight.
You can also lightly mist the fabric with water before working with it to help reduce shedding.
Overall, polyester faux fur is an excellent alternative to real fur. It’s warm, soft, and comes in a wide variety of colors and styles.
Just be aware that it may shed more than other fabrics, so take proper care of it to keep your projects looking their best.
How to Finish Edges of Faux Fur
If you’re working with faux fur, you’ll want to make sure the edges are finished so they don’t unravel. There are a few different ways to do this, and the best method will depend on the type of fur you’re using. One way to finish the edges of faux fur is to use a hot glue gun.
Apply a line of glue along the edge of the fabric, then press the fur down onto it.
Fur Coat Shedding Spray
As the weather gets colder, you may find yourself reaching for your fur coat to keep warm. But if your fur coat is shedding, it can be a real nuisance. A good fur coat shedding spray can help to keep your coat looking its best and minimize shedding.
There are a few things to look for when choosing a fur coat shedding spray. First, make sure that the spray is safe for use on furs. Some sprays contain chemicals that can damage or discolor fur.
Second, choose a shed-reducing spray that is easy to apply and dries quickly. Third, select a product that contains natural ingredients like essential oils or botanical extracts to condition the fur and help prevent Shedding in the future. When using any type of fur coat shedding spray, be sure to follow the directions on the label carefully.
Apply the spray evenly over the entire surface of the fur, taking care to avoid sensitive areas like the eyes and nose. Allow the spray to dry completely before wearing your fur coat again. With regular use, you’ll notice a significant reduction in shedding!
How to Sew Faux Fur
Faux fur is a great alternative to real fur. It looks and feels like the real thing, but it’s usually made from synthetic materials. Faux fur is also more affordable than real fur, and it’s easier to care for.
If you’re interested in learning how to sew with faux fur, here are a few tips to get you started.
1. Choose the right type of faux fur. There are different types of faux fur available on the market, so it’s important to choose one that will work well for your project.
Consider the weight and pile of the fabric when making your selection.
2. Cut the fabric carefully. When cutting faux fur, use sharp scissors and take care not to cut too close to the skin side of the fabric.
This will help prevent fraying and ensure that your finished product looks neat and tidy.
3 seam allowance when sewing fauxfur 3/8 inches (10mm)
4 use a walking foot if possible
5 If hand sewing use a slip stitch – this will give some “give” in the seam so that it doesn’t pull on the delicate skin side of the fabric
6 Don’t forget about stabilizing! Just like with any other fabric, you’ll want to stabilize areas where there will be stress on the seams (such as around armholes).
You can use interfacing or even strips of tulle for this purpose.
How to Stop Fur Coat from Shedding
One of the most frustrating things about owning a fur coat is dealing with the shedding. It seems like no matter what you do, your fur coat is always shedding. But there are some things you can do to help reduce the amount of shedding and keep your coat looking its best.
First, make sure you’re brushing your fur coat regularly. This will help to loosen any dead hair and allow it to fall out on its own. You can use a special brush made for Fur coats or a soft bristled brush.
Be gentle when brushing and avoid using too much force as this could damage the fur.
Secondly, take your fur coat to a professional every few years for a good cleaning. This will remove any built-up dirt and oil that could be causing the excess shedding.
A professional will also be able to check for any other issues that could be causing the problem such as mites or poor diet.
Finally, if you live in an area with high humidity, consider storing your fur coat in a cool, dry place when not in use. Humidity can cause Fur coats to shed more than usual so keeping it stored in a dry environment will help to minimize this issue.
How to Trim Faux Fur With Scissors
Faux fur is a synthetic material made to resemble animal fur. It is usually used for clothing but can also be used for other purposes, such as upholstery or dolls. Faux fur has many of the same properties as real fur, including the ability to be trimmed with scissors.
There are a few things to keep in mind when trimming faux fur with scissors. First, the length of the scissors should be appropriate for the thickness of the fur. Second, it is important to use sharp scissors so that the cut is clean and does not create frizz.
Finally, take care not to cut too much off at once; it is always better to err on the side of caution and trim a little bit at a time until you achieve the desired look.
To begin, gather your supplies: scissors, comb, and mirror. Start by combing through the fur to identify any areas that need to be trimmed.
Once you have determined where you will make your cuts, comb the fur in that section away from the rest of the coat so that it stands up straight. This will make it easier to see what you are doing and prevent you from accidentally cutting too much fur off.
Next, holding the scissor blades perpendicular to the direction of the hair growth, make small snips into the ends of each strand of hair.
Be careful not to cut too deeply or you may end up cutting off more than you intended! Continue snipping until all of the hairs in that section have been trimmed evenly. If necessary, comb through again and trim any uneven areas.
Finally, step back and take a look at your handiwork in a mirror; if everything looks good then congratulations – you’ve just learned how to trim faux fur like a pro!
How to Cut Faux Fur for Gnome Beards
If you’re looking for a fun and festive way to add some holiday cheer to your home, consider making gnome beards out of faux fur! It’s a relatively simple project that only requires a few supplies, and it’s a great way to use up any leftover fur from other projects. Here’s how to do it:
1. Cut a rectangle of fur that is about 4 inches wide and 12 inches long. This will be the base of your beard. 2. Find the center of the rectangle and cut a small slit down the middle.
This will be where you insert the nose later on. 3. On each side of the center slit, cut another smaller slit about 1 inch long. These slits will be for the eyes.
4. To make the mouth, cut a curved line across the bottom of the beard rectangles, connecting the two eye slits. Make sure that the curve is shallow enough that there is still plenty of room for the nose! 5Now it’s time to start shaping your beard.
First, trim off any stray hairs or uneven edges around the perimeter of your rectangle. Then, using scissors or a razor, begin trimming away pieces of fur from inside your rectangle until you have achieved your desired shape. If you want more than one layer to your beard (like many real gnomes have), simply repeat steps 1-5 with additional rectangles of fur until you have as many layers as you desire!
6Once you’re happy with your beard shape, it’s time to attach it to your gnome! Find an old sock or piece of fabric that can serve as his head, and stuff it with batting or other stuffing material until it’s firm but pliable. Then hot glue or sew your beard onto him, being sure to align those slits in the center with where his eyes and mouth should go!
And voila – you’ve got yourself an adorable little gnome friend to help spread some holiday cheer!
How to Cut Fur Fabric
Fur fabric can be tricky to cut, but with a few tips and tricks, it can be done relatively easily. Here are some things to keep in mind when cutting fur fabric: 1. Use sharp scissors.
This will help prevent the fabric from fraying and make clean, straight cuts. 2. Be careful not to cut too much off at once. It’s better to make several small cuts rather than one large cut, as this will help prevent the fabric from stretching out of shape.
3. When cutting curves, use a template or pattern to guide your scissors. This will help you get nice, clean curves without any jagged edges. 4. If possible, have someone else hold the fur fabric while you’re cutting it.
This will help keep it from moving around too much and making it difficult to cut accurately.
How Do You Stop Fabric from Shedding?
If you’ve ever dealt with a fabric that sheds, you know how frustrating it can be. Not only is it unsightly, but it can also ruin your clothes and make them uncomfortable to wear. The good news is that there are a few things you can do to stop the fabric from shedding.
The first step is to identify the type of fabric that’s shedding. Some fabrics, like wool, are more prone to shedding than others. Once you know what type of fabric you’re dealing with, you can take steps to treat it accordingly.
If the fabric is wool, start by gently hand-washing it in cool water with a mild detergent. Avoid using hot water or putting the wool in the dryer, as this can cause further shedding. If possible, air-dry the wool item instead of using a towel to avoid creating static electricity which can make shedding worse.
Once the wool item is dry, lightly mist it with water and smooth any rough areas with your hands.
How Do I Stop My Fur Coat from Shedding?
Your fur coat is an important part of your wardrobe and you want to keep it looking its best. Here are some tips on how to stop your fur coat from shedding: 1. Brush your fur regularly.
This will help remove loose hair and prevent matting. 2. Avoid getting your fur wet. Water can cause the fibers to weaken and break, leading to shedding.
3. Store your fur properly. Hang it in a cool, dry place away from direct sunlight or heat sources. Use a breathable garment bag or box when storing for long periods of time.
4. Have your fur professionally cleaned and conditioned every few years by a qualified Furrier.
Does Faux Fur Shed?
Faux fur is a man-made fabric that is designed to resemble real animal fur. It is usually made from acrylic, polyester or modacrylic fibers. Faux fur has many uses, including in clothing and as a trimming or decoration on furniture and other items.
Despite its name, faux fur does shed. This is because the individual fibers that make up the fabric are not securely fastened to one another and can become loosened over time with wear and washing. Shedding may be more noticeable with some types of faux fur than others, depending on the quality of the fabric and how it was made.
How Do You Stop Faux Fur from Fraying?
If you’re looking to keep your faux fur in pristine condition, you’ll want to take some preventative steps to stop it from fraying. First, avoid brushing or rubbing the fabric too harshly – this can damage the fibers and cause them to break. Instead, gently pat or blot the area clean.
Second, be careful when storing your faux fur – keep it away from sharp objects that could snag or tear the material. Finally, if you do notice any fraying, trim away the loose threads with a sharp pair of scissors. By following these simple tips, you can keep your faux fur looking fabulous for years to come!
How To Cut Faux Fur Fabric For Minimal Shed – EcoShag™
Conclusion
If you’re the proud owner of a faux fur coat, hat, or scarf, you know that one of the downsides to this type of fabric is that it sheds. A lot. While it’s not possible to completely stop your faux fur from shedding, there are a few things you can do to minimize the problem.
First, avoid wearing your faux fur on rainy days or in humid environments; both can cause the fibers to shed more than usual. Second, invest in a good lint brush and use it regularly to remove any shedding fibers from your clothing. Finally, don’t forget to groom your faux fur regularly with a comb or brush designed specifically for this purpose; this will help keep the fibers from getting too matted and will also help reduce shedding.