If you’ve tried to load an SVG straight onto your embroidery machine and it didn’t work, here’s the thing nobody tells you up front: you can’t just convert an SVG to an embroidery file — it has to be digitized. An SVG describes shapes and colors; an embroidery file describes individual stitches, their type, direction, and order. Bridging that gap is the real task, and it’s worth understanding before you reach for a one-click converter that gives you a bird’s nest of stitches.
SVG vs. embroidery files — why it’s not a simple export
An SVG is vector art (points and paths). An embroidery file (PES, DST, JEF, and others) is a stitch map your machine follows needle by needle. Going from one to the other means deciding how each shape should be stitched — a fill here, a satin border there, this color before that one. That decision-making is called digitizing, and it’s what separates embroidery that lies smooth from embroidery that puckers and frays.
How to actually do it
- Start with a clean SVG. Simple, well-defined shapes digitize far better than busy, detailed art. Tidy up stray points and merge shapes in a vector editor first.
- Open it in digitizing software. The free, popular choice is Ink/Stitch, an extension for the free vector program Inkscape — it turns SVG paths into stitches. Paid options include Hatch, Wilcom, Brother PE-Design, Embird, and SewArt.
- Assign stitch types. Mark which areas are fill stitches, which are satin (good for borders and text), and which are simple running stitches. Set the stitch direction, density, and an underlay so the design sits flat.
- Set the stitch order and colors so the machine sews efficiently and you change thread the fewest times.
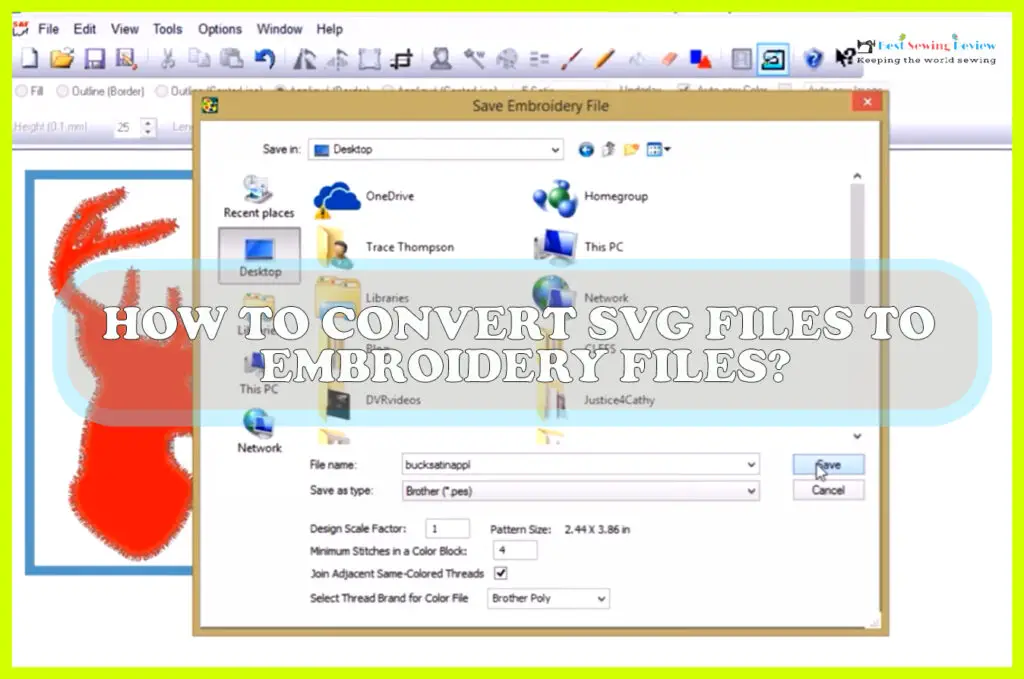
- Export to your machine’s format (see below), stitch a test on similar fabric, and tweak density or underlay if it puckers.
Which embroidery format does your machine use?
| Format | Machines |
|---|---|
| PES | Brother, Babylock, and Bernina (older) |
| DST | Tajima and most commercial machines (no color data) |
| JEF | Janome |
| VP3 / VIP | Husqvarna Viking, Pfaff |
| EXP | Melco, Bernina |
| ART | Bernina (native) |
If you only need one design and don’t want to learn digitizing, a professional digitizer will convert your SVG properly for a few dollars — often the best value for a single project. But if you’ll do this regularly, Ink/Stitch is a free, capable place to learn.
Frequently asked questions
Can you convert an SVG directly to an embroidery file?
Not directly — an SVG has to be digitized into stitches. Software like the free Ink/Stitch turns SVG paths into an embroidery file by assigning stitch types, density, and order.
How do I convert an SVG to a PES file?
Open the SVG in digitizing software (Ink/Stitch, Hatch, or PE-Design), assign stitch types and order, then export as PES — the format Brother and Babylock machines read.
What’s the best free software to convert SVG to embroidery?
Ink/Stitch, a free extension for Inkscape, is the most capable free option. SewArt offers a low-cost trial as well.
Why does my converted design pucker or look messy?
Usually it was auto-converted without proper digitizing — the stitch density, direction, or underlay is wrong. Re-digitize with the right settings, or use a professional digitizer for clean results.